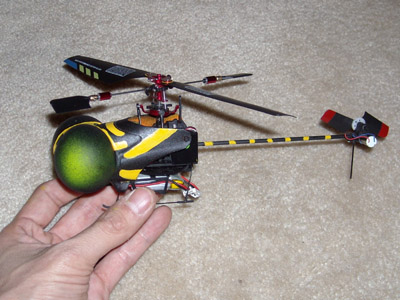
Walkera 4#3B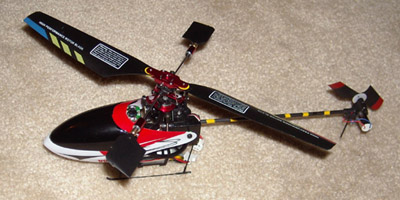 |
Custom dragonfly canopy
 |
 |
 |
 |
 |
I've had this idea ever since I started flying r/c helicopters. It wasn't until I got the tiny Walkera 4#3B, that I couldn't
resist it any longer, and had to figure out a way to make a canopy resembling a dragonfly for this critter.
Walkera 4#3, and 4#3B are ready to fly helicopters. This heli is quite a handful, NOT a beginner
heli because of it's size (the larger the heli, the more stable & easier it is to fly). It may look like a
cheap little toy, but it is really a nicely made r/c machine. The 4#3 is pretty squirly, but once
you get a hang of it (I'm still trying), it is very rewarding to buzz around inside of the house. This little
guy is alsmot indestructable, even hard crashes doesn't seem to harm it much, unlike any other heli
that I've had expereienced with. If you are new to the r/c helicopter hobby, and want to give it a shot,
I'd recommend a coaxial (CX) type heli, such as the Walkera #5-5 or the Blade CX2. The coaxial types
are much more stable, and much easier to control than Fixed Pitch (FP), or Control Pitch (CP) type helis.
Check out my other heli videos here
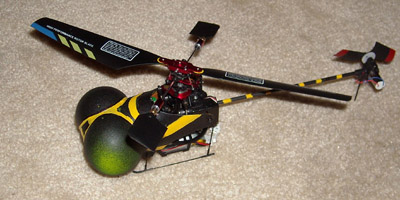
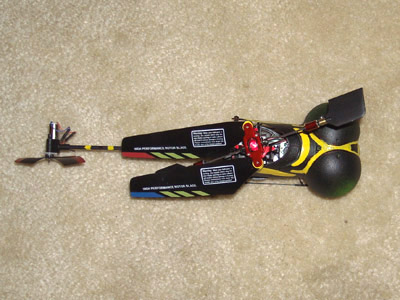
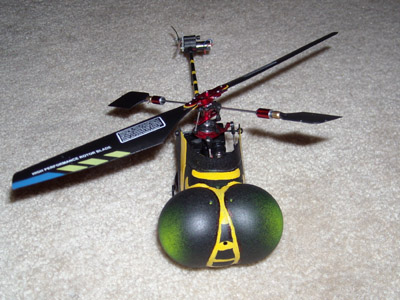
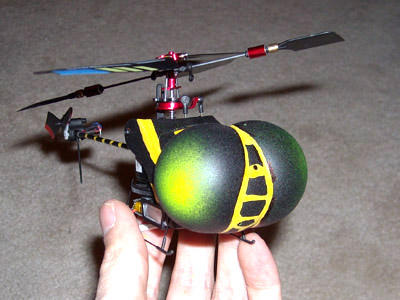
Unfortunately this turned out to be a very heavy canopy. Stock Walkera 4#3B canopy is 2.1g, and the dragonfly canopy
weighs in at 7.3g. This makes a huge difference on a heli this small, defintley made it harder to control.
Because of the added weight to the nose of the heli, you have to slide the battery towards the back
slightly, to achieve proper center of gravity.
How to make the dragonfly canopy for the 4#3
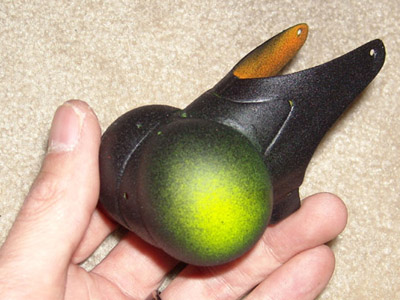
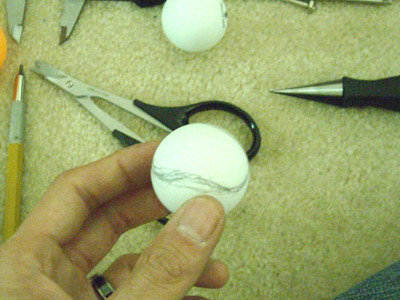 1) Start by drawing trim lines on pin pong balls. Use lexan scissors and reamer to cut and trim. |
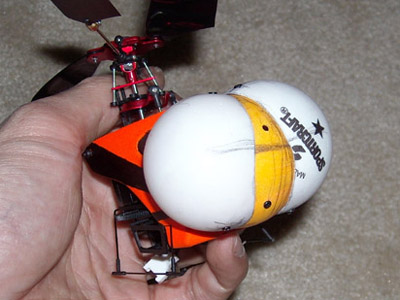 2) cut off about an inch off the front of the canopy. Attach the trimmed ping pong balls for the head/eyes with small screws. Fill the seams with thin CA glue. Once dried, remove the screws to save a bit of weight. |
 3) Use spray paint made for plastics. This is lexan yellow, followed by textured black plastic paint. Use light colors first, as it will not cover over dark areas well. |
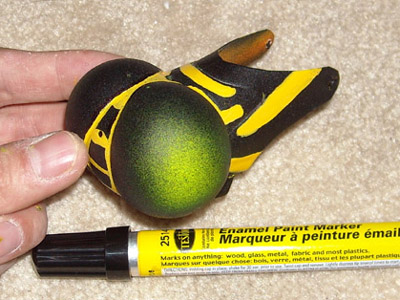 4) I used an enamel paint marker to mark in the yellow streaks and highlights. If you go color over areas that you don't want, you can use a sharpie to touch it up. I also used the yellow marker on the tail boom stripes. |
Back to Crabfu MotionWorks
Crabfu SteamWorks Crabfu Art & Animation
