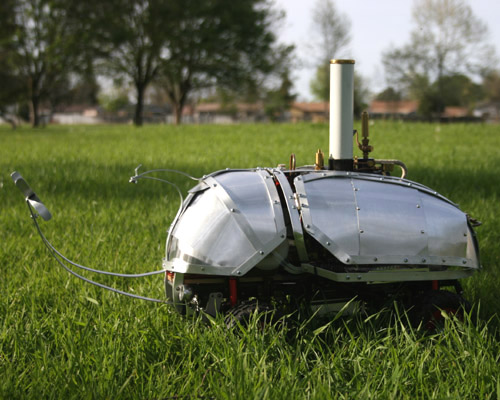
The Chassis
I'm a huge fan
of Tamiya, everything Tamiya is subject to careful consideration for a
steam conversion ( this is the 8th one so far ). I've been thinking
about this High-Lift steam conversion for quite some time, and finally
devoted my best running steam plant to the project. The reasons for
using the High-Lift as a steam project, are because it has a nice
location for a motor, strong frame, nice stiff leaf spring, and 3 speed
tranny.
Mounting the steam engine and boiler on the Tamiya High-Lift Chassis |
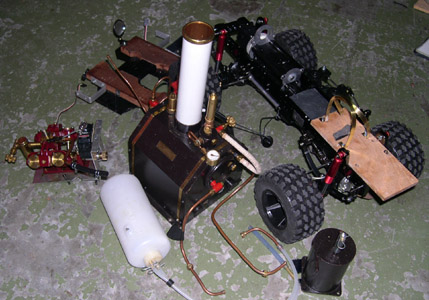
Parts
disassembled
|
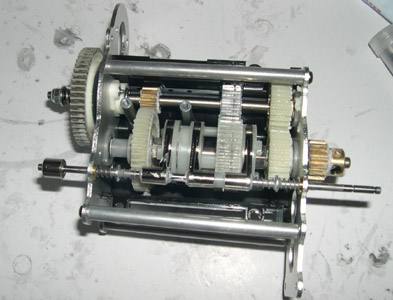
3 Speed Tranny
|
Steam conversion
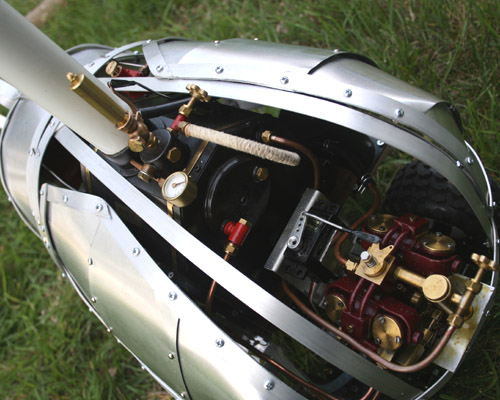
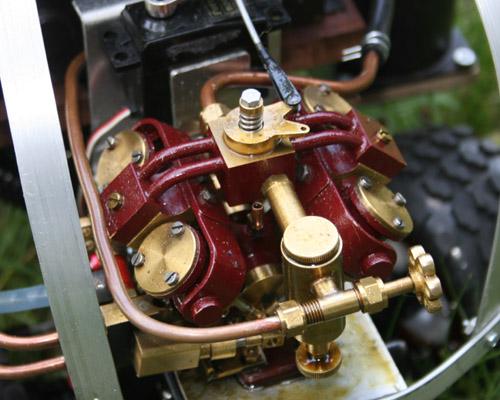
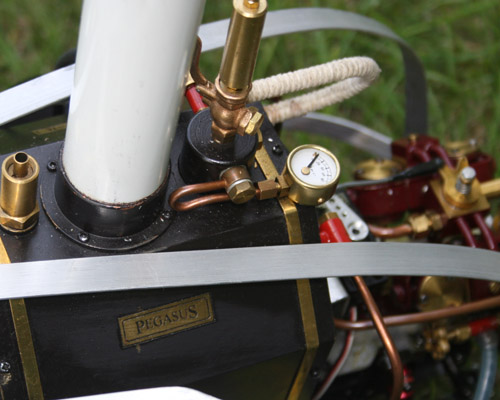
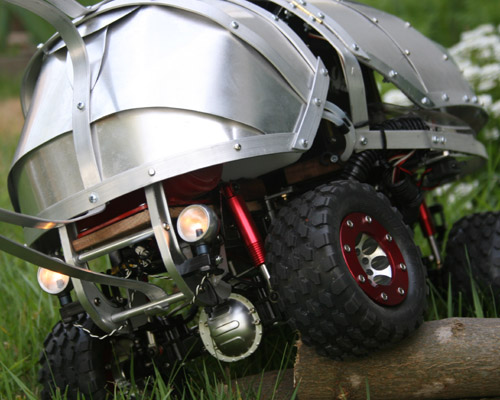
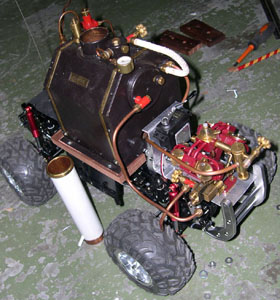
The Cheddar Pegasus is a marine plant, so the engine
is made to fit propeller shafts. Adapting it for this project required
the engine to adapt to a much smaller pinion shaft. Luckily the
High-Lift chassis had just enough room in the front (which later became
the back)
to fit the 4 cylinder engine. The boiler was mounted as centered
to the
chassis as possible to spread out the distribution of the weight to the
four wheels.
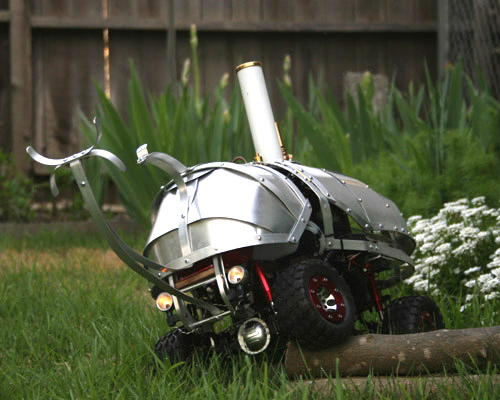
The super heavy weight fight
Although it looked like one of the
simpler projects, it turned out to be quite a nightmare solving all
sorts
of issue while converting it to steam. In the end it ran better than I
could have hoped for, but it was not an easy road. Tamiya
designed the High-Lift for the light weight of electric rigs.
The single
biggest problem was the weight of the steam parts, the Steam Beetle
weighs in at 20 lb. empty with no water.
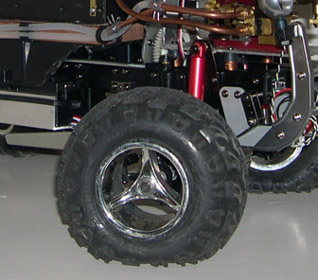
The first issue with the weight started in the wheels
and tires. I replaced the stock tires and wheels to 2.2, but
immediately
encountered flat tires, especially when crawling. The stock
foam can not support the
weight, and the tires basically were always compressed, with the rim of
the wheels grounded. This also made it impossible to turn at all.
I found the foam solution by replacing the tire
foams with extra large pool noodles. These have the correct outer
diameter, and only required the inner hole to be
trimmed to fit the rims.
RC4WD
provided me with a set of really sweet
bead locks, and these really helped in holding the foam and
tire in place, bolts to both sides of the rims. These aluminum wheels
are
really nicely machined, and fit
perfectly.
2.2 rims with foam. The foam did
not support the 20 lb weight of the
steam beetle.
|
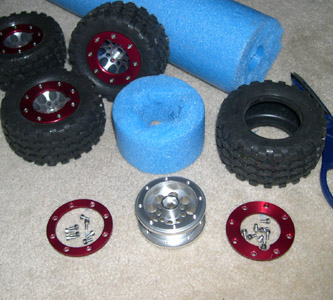
RC4WD bead locks with pool
noodle as foam. These rims are beautifully
machined aluminum, and bolted on both sides.
|
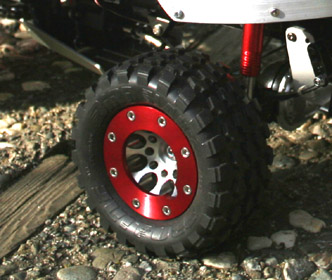
Final wheels works perfectly.
|
Second issue was the suspension.... when
you turn, it leans, and stays leaned. I had similar issues with my
steam rover, but at least that one had 6 wheels and shocks to spread
out the load. Luckily this was easily solved by using
the maximum amount of leafs supplied in the High-Lift kit. And lastly,
the weight
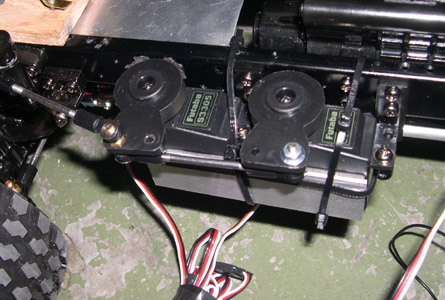
really gave the servos a hard time when it came to steering. I had
doubled up the servos with 2 high torque futabas, initially for 4
wheel steering. However, the wheels just wouldn't budge under the load.
I
then locked the back wheels, and linked the servos together to just
steer the front. I also had to, for the first time, rely on 7.2v
battery to power the servos.... all 7 of them.
Doubled up the steering servos with 2 futaba s3305 high torque servos
|
To further improve the performance to the chassis, I upgraded all of
the
bearings to ball bearings. This made a pretty noticeable difference. I
just wished that I had put in the ball bearings during the initial
build of the chassis,
as replacing them meant disassembling just about everything! I also
locked the front and rear differentials, since this thing won't be
breaking any land speed records..... although I am pretty sure that
it's the fastest R/C steam beetle on the planet.
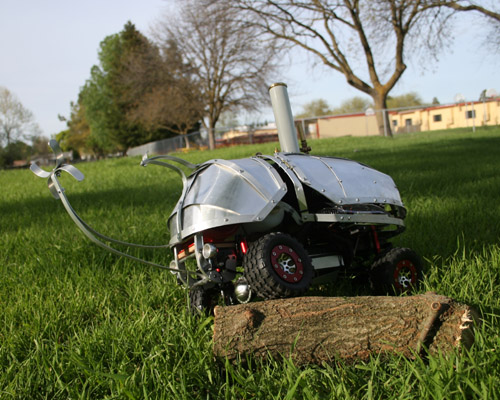
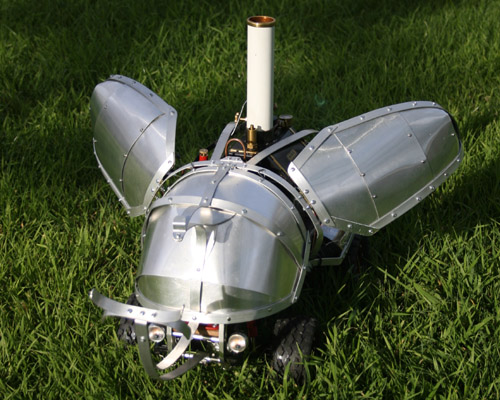
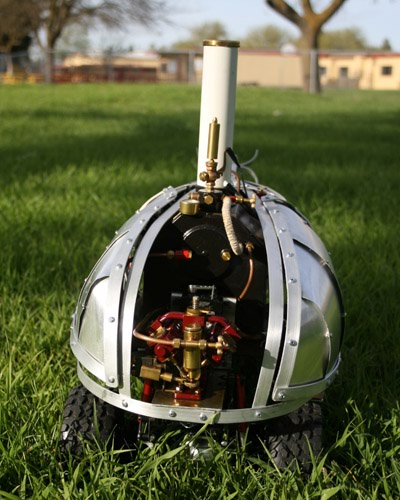
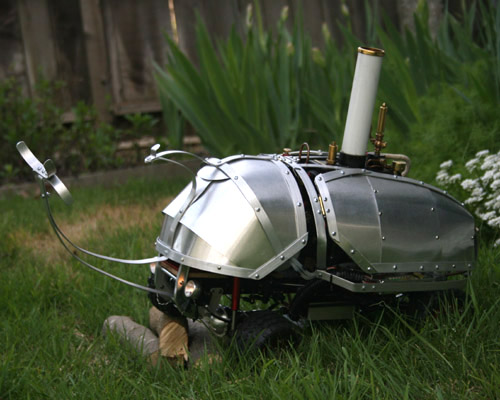
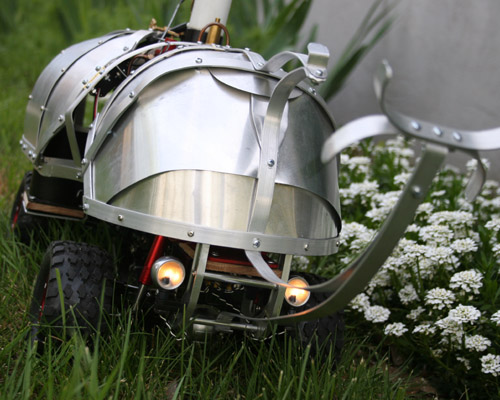
The Air Steam Bug
After getting these issues worked out, it's time to take just a
steam 4x4 and add some character to it. Once again I turn to nature for
the best designs. I decided a beetle would be suitable for a crawler,
and immediately went for my favorite bug, the Japanese rhino
beetle (
Allomyrhina dichotomus). First step is
to switch the front and rear ends of the high lift, because I really
wanted to have the engine exposed in the back, and not hidden in the
head. Part of the appeal of SteamPunk is the visibility of the
mechanics, and I rather not cover it all up. After laying out the
aluminum frame, I realized that it looked
very familiar. After some surfing, I found that an old anime show
called Time Bokan, has a beetle vehicle called Mechabuton, it has
wings that can open, as well as an engine in the back! I have vague
memories of the show.... must have stored it away as a kid, and
filed it under: "make one of these when you grow up"

Allomyrhina dichotomus

Time Bokan Mechabuton
|
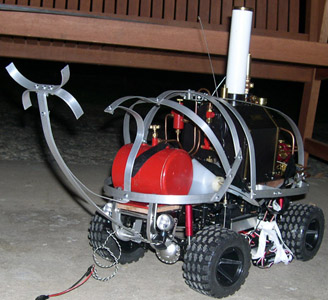
Start of the aluminum frame |
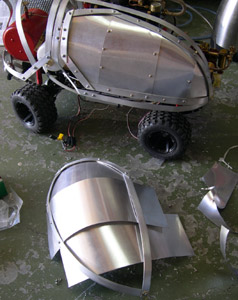
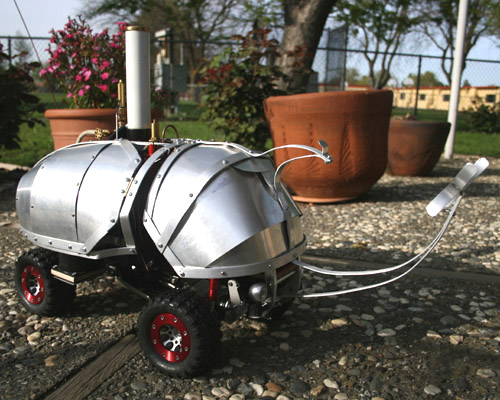
Aluminum sheet metal body |
The aluminum frame were bought at a local hardware store, they come in
variety of thickness and lengths. Aluminum is light, easy to drill,
cut, and bend, great stuff to work with. The aluminum sheet metal
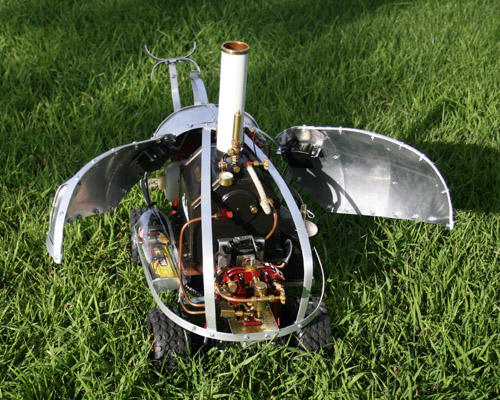
was then applied by nuts and bolts. Hinges were used for the head - as
to get to fueling the gas tank, water reservoir, and igniter. hinges
were also added for the wing
shells- to get to the condenser and rc gear.
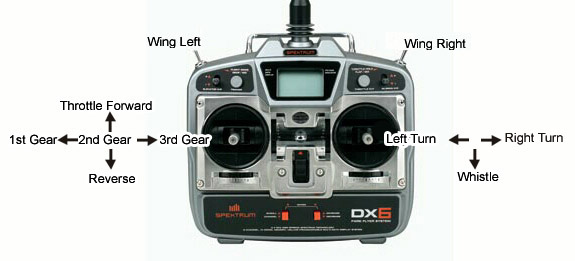
Radio Control
I got all geeked out and used 2.4 GHz DSM spread spectrum this
time, and used the Spektrum DX6.
After using up the joysticks, I had 2 extra channels left, might as
well add servos to the wing shells. Adding the servos to the wings were
more challenging than I had anticipated, there isn't much room for
servos. After some hair pulling, I realized that servos can be mounted
to the inside of the shells themselves, rather than to the frame to
control the shells.